Next Stop.

11:24 AM Unknown 0 Comments


8-17-14: Next Stop-Boston, MA

This is actually an extremely accurate representation of packing for college. To be honest, I was actually really stressed trying to pack everything to move to Boston. I always had to ask myself, "Do I need this to survive?" As a self-declared pack rat, it's extremely hard to just pack the essentials. So, I gathered all my stuff I thought I was going to need in my daily life. After compiling so much stuff, and more, I just wanted ship myself to college and that's it. But no, a girl's got to bring clothes, bedding, etc (and fit it into a tiny dorm). 4 luggages and 2 carry-ons later, I finally finished packing.

Now that I'm all move-in, I can say that I probably over-packed. Oh well, being over prepared never hurt anybody. Maybe I'll show you what my dorm looks like. Just maybe.
0 comments:

LA♥MA

1:45 AM Unknown 0 Comments


Featured: LACMA
Outfit: top + bralette- UO | shorts- gift | necklace- diy | shoes- Jeffrey Campbell | sunglasses- Michael Kors

If you censor the C in LACMA you get LA and MA. It's like a friendly reminder than I am moving from LA to Boston in a few days. LOL sorry for my lameness. Anyways, this weekend I went to LACMA! My family and I got to see the Van Gogh exhibit. AHHHHH. I mean, it was pretty cool. It's actually really cool just seeing artworks of people that you've learned about in school. It's just adds to your appreciation of art and history. 

But yeah, I've been wearing this outfit a lot (no shame) lately. It's like the perfect lazy, but put-together outfit. I have no patience when it comes to dressing up in hot weather. So, get that bra out the way, and bring on the bralette. And put on a shirt with A+ ventilation. This shirt is probably a little scandy, but I can't tell with fashion now-a-days. It has lace panels on the sides of it. To make it seem less promiscuous, I wore some high-waisted shorts. 

Along with this scandy-ventilation thing, I wore some cut-out boots. I'm absolutely obsessed with them. I think they add that bad-ass vibe that I don't actually have. To add a more quirky element, I wore a Japanese-sandal necklace. Usually in hot weather, I like to accessorize with minimal/dainty jewelry. It makes the outfit look put-together, but it doesn't stick too much when you're sweating (trying to take pictures in yellow noodles).

If you didn't get my drift. It's hot in Topeka Cali right now. It's also almost 2 am. Slowly loosing my noodles. Oodles of Noodles, good night.

0 comments:

Decoration Installation

12:54 AM Unknown 0 Comments


Materials: Wire Net- check out this | Command Hooks- here | Magnets- check out this |
More Accessories

Pushpins? Nah, they ruin your photo with a hole. Tape? That ruins the paper too. Twine? Too cumbersome. I don't know for how long, but I've been searching for the perfect way to display my pictures. Originally, I wanted large magnetic, whiteboard tiles. But, I realized that it's too expensive. Instead, I opted for this wire net I found at Daiso. The net allows me to display my pictures but also it works as a customizable storage rack. This idea is similar to the Container Store's Polytherm Grid System-here, but Daiso has all the materials for only $1.50 each. Obviously, if you are not near a Daiso store, the Container Store has all the materials you could dream of (plus I think the quality is way better). But hey, we're on a college student's budget here. Anyways here are the steps to installing this simple, but crazy useful display:

1. Place your Command hooks on the wall. I like to install both the hooks and the net at the same time to skip the whole measuring process.

2. Helpful tip: If you are planning to hang baskets on your rack, I suggest two medium/large sized hooks. If you are just going to display pictures, I suggest two small hooks on top, and a third hook on the bottom (to keep the rack from moving).

3. Attach accessories and decorations. S-hooks and attachable baskets work great!

4. Optional Make your own. I made some small S-hooks from paperclips. They are great for hanging small things. Just bend the middle section of the paperclip until you have a s-shape. 

5. Helpful tip: If something is too thick for the magnetic, you can paperclip it and hang it from an S-hook. See last photo.

I just bought a bunch of these wire racks for my college dorm, and I couldn't help to share this idea with you. I hope you enjoy!


0 comments:

Special Pesto.

11:29 PM Unknown 0 Comments


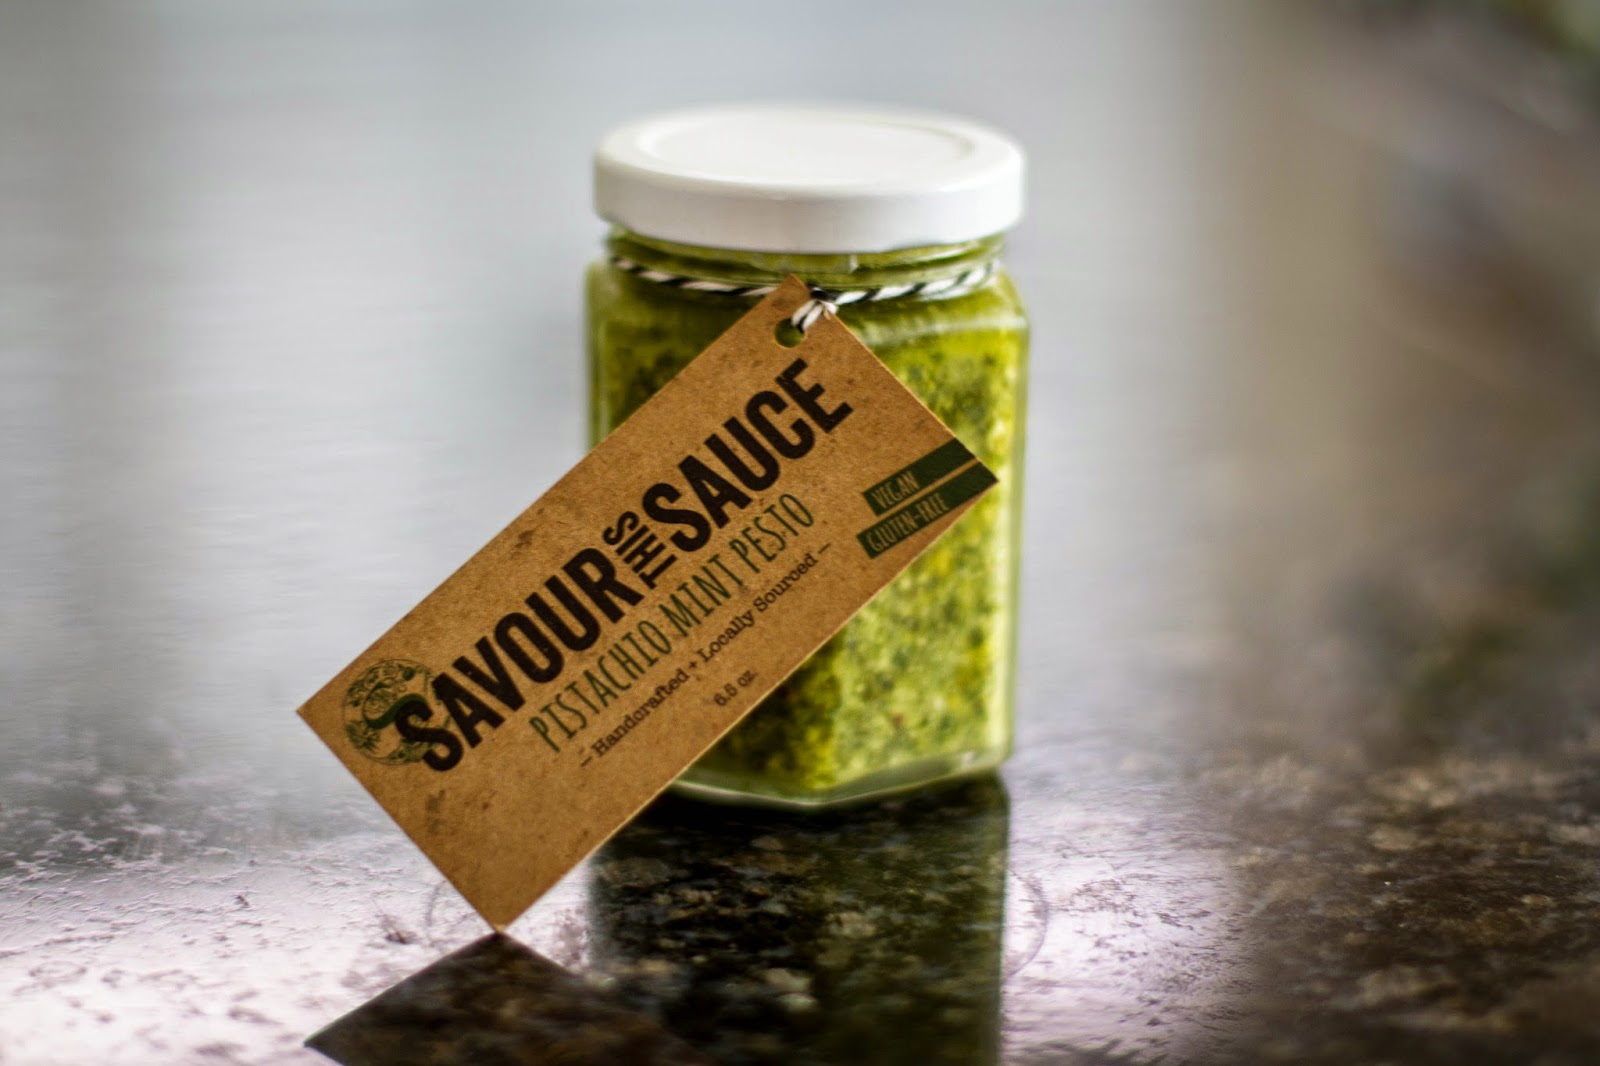
Featured: Pistachio Mint Pesto- Savour this Sauce
Ingredients: Pesto | Multi-Grain Bread | Mixed Greens | Turkey 

I found some kick-ass pesto sauce at the farmer's market last weekend. I can't say that I am a pesto connoisseur, but I've never tasted a sauce like this. It has pistachios for goodness sakes. What? I know. Crazy. On a whim, I decided to buy it. Life is short, why not enjoy some quality food while you're at it. Plus, I'm a sucker for cute packaging. 

And now, I have less than a week to finish this jar. It doesn't expire until the 24th, but I leave for Boston before then. So, I'm trying to think of the various contraptions that I can eat with my pesto. Obviously I am too lazy to actually cook something. Here is my first dish using my pesto: a sandwich. So creative, I know.

In my defense, it was a pretty good sandwich. I'm one of those people who've eaten 5 billion versions of the same turkey, mayo, and bread sandwich. So, this was a nice change. 

Final Verdict: I honestly like this pesto for it's surprising use of pistachios. It adds an interesting texture to an otherwise mushy sauce. However, it's a bit on the oily side. It's probably not the best thing to put on toast, or a sandwich, but it works. I'd suggest adding it to pasta. Maybe I'll try that later.


0 comments: